DIY Clip-on Tubes
If you are budget oriented track day enthusiast or racer this post is going to save you a few bucks. It might even save you enough to help tack on an extra race at the end of the year or it could help out a fellow track day or racing comrade in a time of need. Most of us that have done track days or raced have crashed by now or know someone close that has, and if we haven’t, it will happen eventually. Crashing is more likely to happen when we push ourselves past our comfort zone and reach onto new milestones.
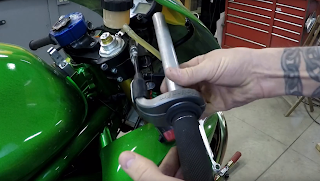
The thing that gets damaged the most is the clip-on bar and rearset peg. These two items stick out furthest on the bike and are more likely to be scraped down, bent, or busted off. Money can be saved by fabricating our own. All we need is material, a tape measure, and hacksaw.
I get my material from McMaster Carr but there are multiple sizes of aluminum tubing for this. The original size is 7/8 inch Outside Diameter by 1/8 inch wall or 5/8 inch Inside Diameter.
I use 7/8 inch Outside Diameter with 1/16 inch wall. This may seem a bit thin, but I actually pulled this number from Roadracing World Magazine. I have had great luck with it. In a crash it does bend easier than the original 1/8 inch wall material, but the savings are great enough that I can justify it.
McMaster Carr #89965K661 at the time of this writing it was $25 plus shipping and handling for a 6 foot section. The clip-ons that most of us use are 11inchs long. Using this length we can get 6 clip-ons from a 6 foot chunk (this comes out to $5.88 a clip-on). Much better than $16 a clip-on or $20-25 you might pay a vendor at the track. It pays to take a half hour and make a few and have them on hand.


Comments
Post a Comment